Christmas in July: Tips for Creating and Finishing a Christmas Tag Album with Melinda!
Hey & hello my scrappy friends, it’s Melinda here with you today!
I’m so excited to be sharing my completed “Pixie Fun 2022” Mini Tag album that I created using the 2 gorgeous 2022 Christmas collections – All Is Calm and All Is Bright!

This album was initially created in November last year because I know that December is crazy busy for me and my family and I wanted a way to be able to quickly add photo’s, embellishments and a sentence or two when I had the time with no pressure.
I have started with the 3x4 tags in the All Is Bright collection. I’ve opened them up in my Silhouette software and then dragged and dropped the different patterned cards from both the All Is Calm and All Is Bright collections to fill the tags. Once I had all the patterns in the tags I was able to send them through to my printer and then my silhouette. I also cut enough plain pattern cardstock tags along with gold mylar using the tag outline to back each of the print and cut tags.
I’ve adhered my layers together with a small amount of tape runner and then added red stitching around the edges of all of those tags. Here is a look at what those tags looked like before I added any photo’s and had only created the cover.

You can see my process video (including a Silhouette tutorial) for the creation of the album and my cover in this process video:
Like I mentioned earlier, I created this album knowing I would have not a tonne of time to create during December so I felt like this put me immediately 10 steps ahead of where I may otherwise have been – especially considering myself and my family were all hit with Covid from 15th to 24th December!!
The other thing that I created ahead of time was photo mats. Seems like such a small thing but boy am I glad I had the foresight to do exactly that – it was one less decision I would have to make each time I sat down to create tags for the album. I just used the offcuts of the plain cardstock I have used for the back of my tags and cut them to 2” square.
Knowing that my photo mats were 2” squares also locked me into a photo size – again another thing I wouldn’t have to make a choice about every time I sat down to create. So I went ahead and created a photoshop template which allowed me to print 6 photos at a time at a little smaller than 2” each. Perfect! So many small choices ALREADY made before Pixie had even arrived!!
With my album set up and ready to go I was ready to create, assuming that our elf turned up lol
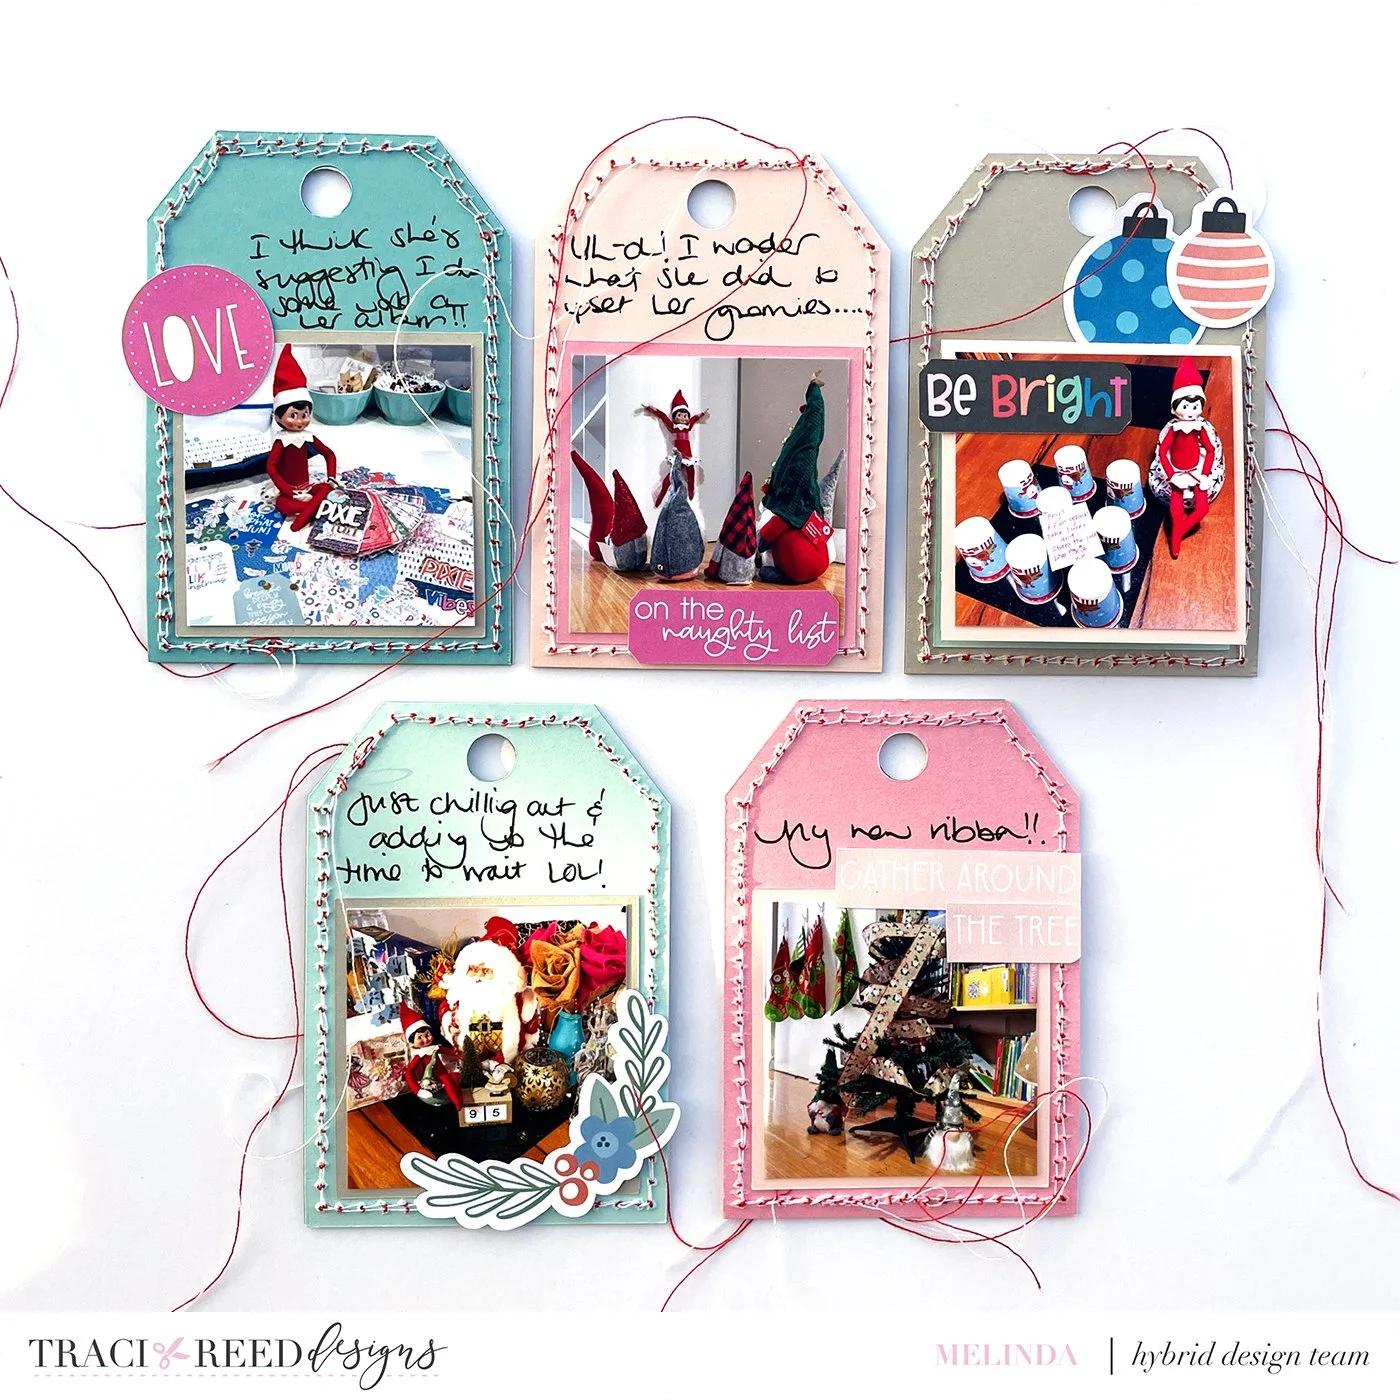
Which, indeed, she did!! YAY! Here are the first 5 days in the album – I used 2 photos on one day so managed the 6 photos but only 5 days! You can see that process video here:
As I had all of the supplies stashed together this was super quick to put together and here are the first 5 days

Now, as I predicted December was crazy and honestly, it’s been non stop since so I have been creating a few days tags’ at a time and a) it took longer than I had anticipated, b) I’m so thankful to my past self for pre-thinking all the small details I did and c) I really had fun creating when I got the chance and now have a completed mini album which I absolutely ADORE!!
My next Pixie Fun creative time was days 6-10 and here are the front of the tags

I also “caught up” on the journalling from days 1-5.
And the back of days 6-10
And my process video for days 6-10 is here:
Moving right along with days 11-16!
At this point I had gone ahead and printed ALL of the rest of my photos, trimmed them up and using a paper clip attached photos and any embellishments I wanted with that specific photo together, ready for my next crafty session! All of these “installments” ended up taking about 30 minutes each and if December had worked differently I totally could have managed to find that time every few days.
Here are the front of days 11-16

And the backs all finished up

And here is my process video:
At this point I finally decided what I was going to do with the “extra” tags that I had created that had all the words cut out from them. Again, with the idea of keeping this “simple” and “doable” I decided I was going to grab 4 of the quote tags and simply attach those to the back of the others.
Looking at what I had left left with me days 17-24 plus the 4 extras which leaves me with 12 – 2 more 30 minute or so sessions, YAY!!
Here are days 17-22


And the process video for that one is here:
And finally, days 23 & 24 with my “extra” tags AND a flip through of my COMPLETED Mini Album!!


And of course, my process video which has gone live with this post is here:
Way back when I created this album I didn’t really recognise the joy I would feel when I got this mini album COMPLETED. Having an ADHD brain; completing things can be really hard. I had the forethought to make a lot of the decisions very early in the process, to keep all of my supplies together and to give myself the grace to get it done when I got it done and honestly, I am so freaking proud of this little album and I simply love, love, love it!!
These supplies, though they seem polar opposites to start with, work so beautifully together and I challenge you to find what seems like polar opposite collections, such as the All Is Calm and All Is Bright collections, mash them together and see what you come up with! It may just be your favourite mini album ever 😉
If you’ve stuck around for my entire post, thank you!! I hope that I have given you some tips that help you in your creative adventures and until next time, happy scrapping!!
Melinda
TRD Products Used In This Post

