Hybrid Tutorial: Using Digital Templates with Your Silhouette Cameo

The adaptability and reusability of digital product is one of its many, many benefits. Often, digital and paper scrapbookers alike will see a product such as a digital template like this one from my Pocket Starters 1 pack as something with a very narrow purpose: a 12x12 digital pocket scrapbooking template to be used in photoshop by a digital scrapbooker only as a pocket page.

Well I’m here to show you how to break all the rules. I used just one 4x6 card from this template to PAPER scrap in my TRAVELER’S NOTEBOOK.

Nope, no digital product here, just the lovely goodness from the Cocoa Daisy Up & Away kits. Also, not a single pocket in sight.
One of my main missions via this blog and my YouTube Channel is to teach all kinds of scrapbookers out there about how versatile and useful digital product can be to them, no matter what format and with which medium they choose to scrapbook.

Hybrid scrapbooking doesn’t always have to involve using digital scrapbooking kits that you have to have printed, sometimes you can use other tools offered by digital designers WITH your paper product.
Today I’m going to be using a single card from my Pocket Starters 1 pack to add to a Traveler’s Notebook layout using the Cocoa Daisy Up and Away collection! I’ll be showing you how to use digital templates with paper product via your Silhouette Cameo.
Check out the step by step tutorial below, or skip to the video at the end!

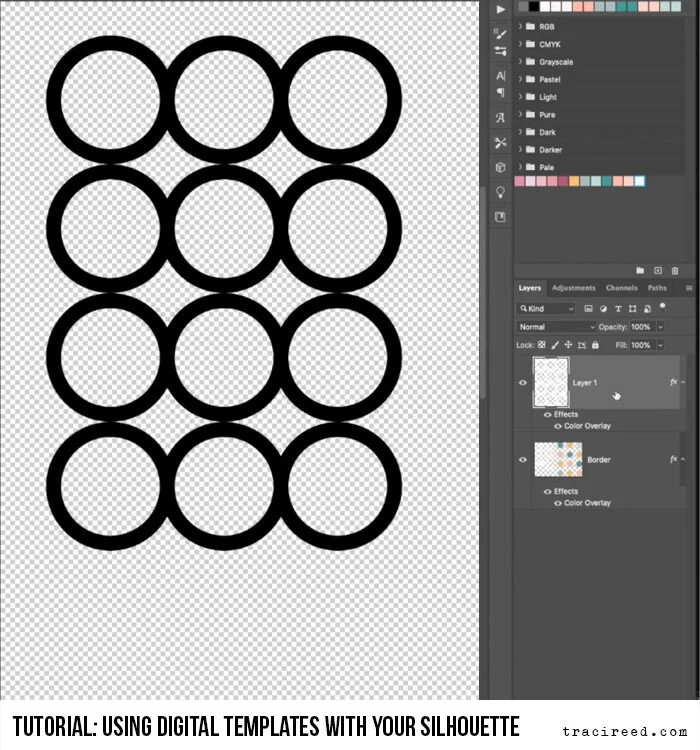
Step One: Open the digital template in your photo editing program. My tutorial is in Photoshop, but you can also use Photoshop Elements, Paint Shop Pro and GIMP with Photoshop (.psd) templates. Pro tip: before doing anything else, duplicate the document to a new file (image>duplicate) and close the original, this way you don’t accidentally save over the original file.

Step Two: Delete all excess layers from the canvas to isolate only the layers you will be working with.

Step Three: Clear the shadow layer style by selecting all the layers, right clicking on any layer in the layer’s palette and clicking “clear layer style”

Step Four: Since we are not going to be using digital papers, we now need to align the pieces of the template on the canvas in an orderly manner so that the silhouette can cut them out.
Using the built-in grid in Photoshop, (CMD (CTRL) + ‘ to turn it on) align each part of the template to a standard space on the canvas. For example, for this template I centered the ring mat in a 5x7 space and each circle in a 2x2 square. This allows for me to cut standard size pieces of paper and align them easily when setting up my silhouette mat for cutting.

Step Five: Once your layers are aligned on the canvas, merge them together (CMD (CTRL) + Shift + E) and double click on the layer in the layers palette to bring up the Layer Styles dialogue box. Then apply a black color overlay to the layer with the blend mode at normal, 100 % opacity. We do this because the silhouette will read black shapes easiest when creating cut lines.

Step Six: If your cut files look like they might be a little delicate (like the joints of these rings) you can solve this problem easily. First, use your rectangular marquee and draw a box around just the portion of the cut file you need to reinforce.
Step Seven: Create a new layer from the selection by hitting CMD (CTRL) + J. You should now have one complete layer and one layer with just the portion you just selected.

Step Eight: To reinforce the cut file, double click on the layer in the layers panel to bring up the Layer Style dialogue box, then add a black stroke to the layer. I chose to make mine 15 pixels, but you can choose the size that works for you. Make sure you choose “center” as the position, as “outside” with sometimes distort the shape of the cut file, depending on if it has corners. Once finished, Save the entire 12x12 canvas as a .png file so that the silhouette software can open it.

Step Nine: Open the .png file you just created in the Silhouette Studio software and click on “Select Trace Area” in the Trace panel
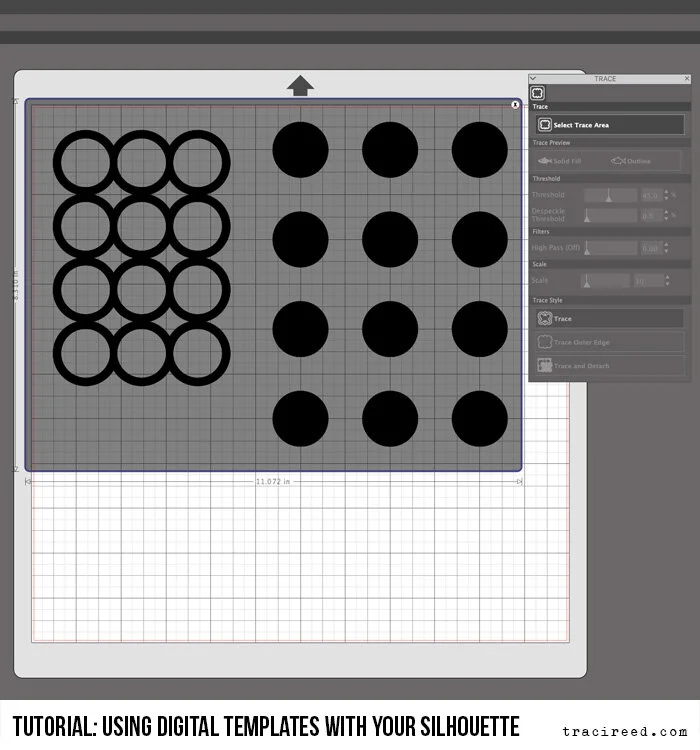
Step Ten: Using your cursor, click and drag to draw a box around the entirety of your cut file and then release the mouse.

Step Eleven: The entirety of your cut file should now be yellow. Click “Trace” at the bottom of the “Trace” palette to create cut lines.

Step Twelve: Click on the black placeholder with your mouse and then hit delete to remove it and check that your cut lines were created correctly. After you’ve set up your silhouette mat to match your canvas in Silhouette Studio, send your cut lines to the Silhouette machine for cutting.
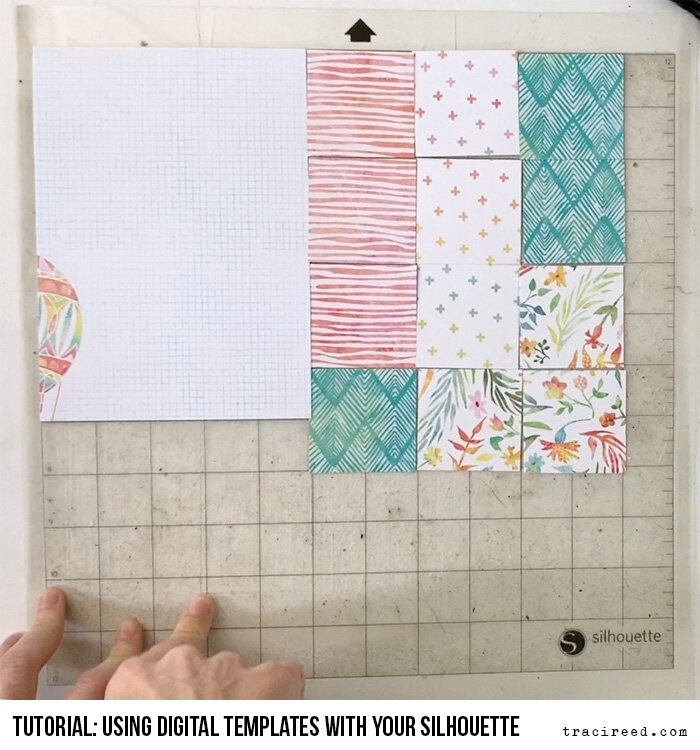
Step Thirteen: Add your selected papers to your (hopefully not as old and dirty as mine) silhouette mat exactly as you set them up on your canvas. Remember, for this template, I needed (1) 5x7 paper for the mat and (12) 2x2 papers for the circles. Send your cut file to the machine and watch magic happen!

