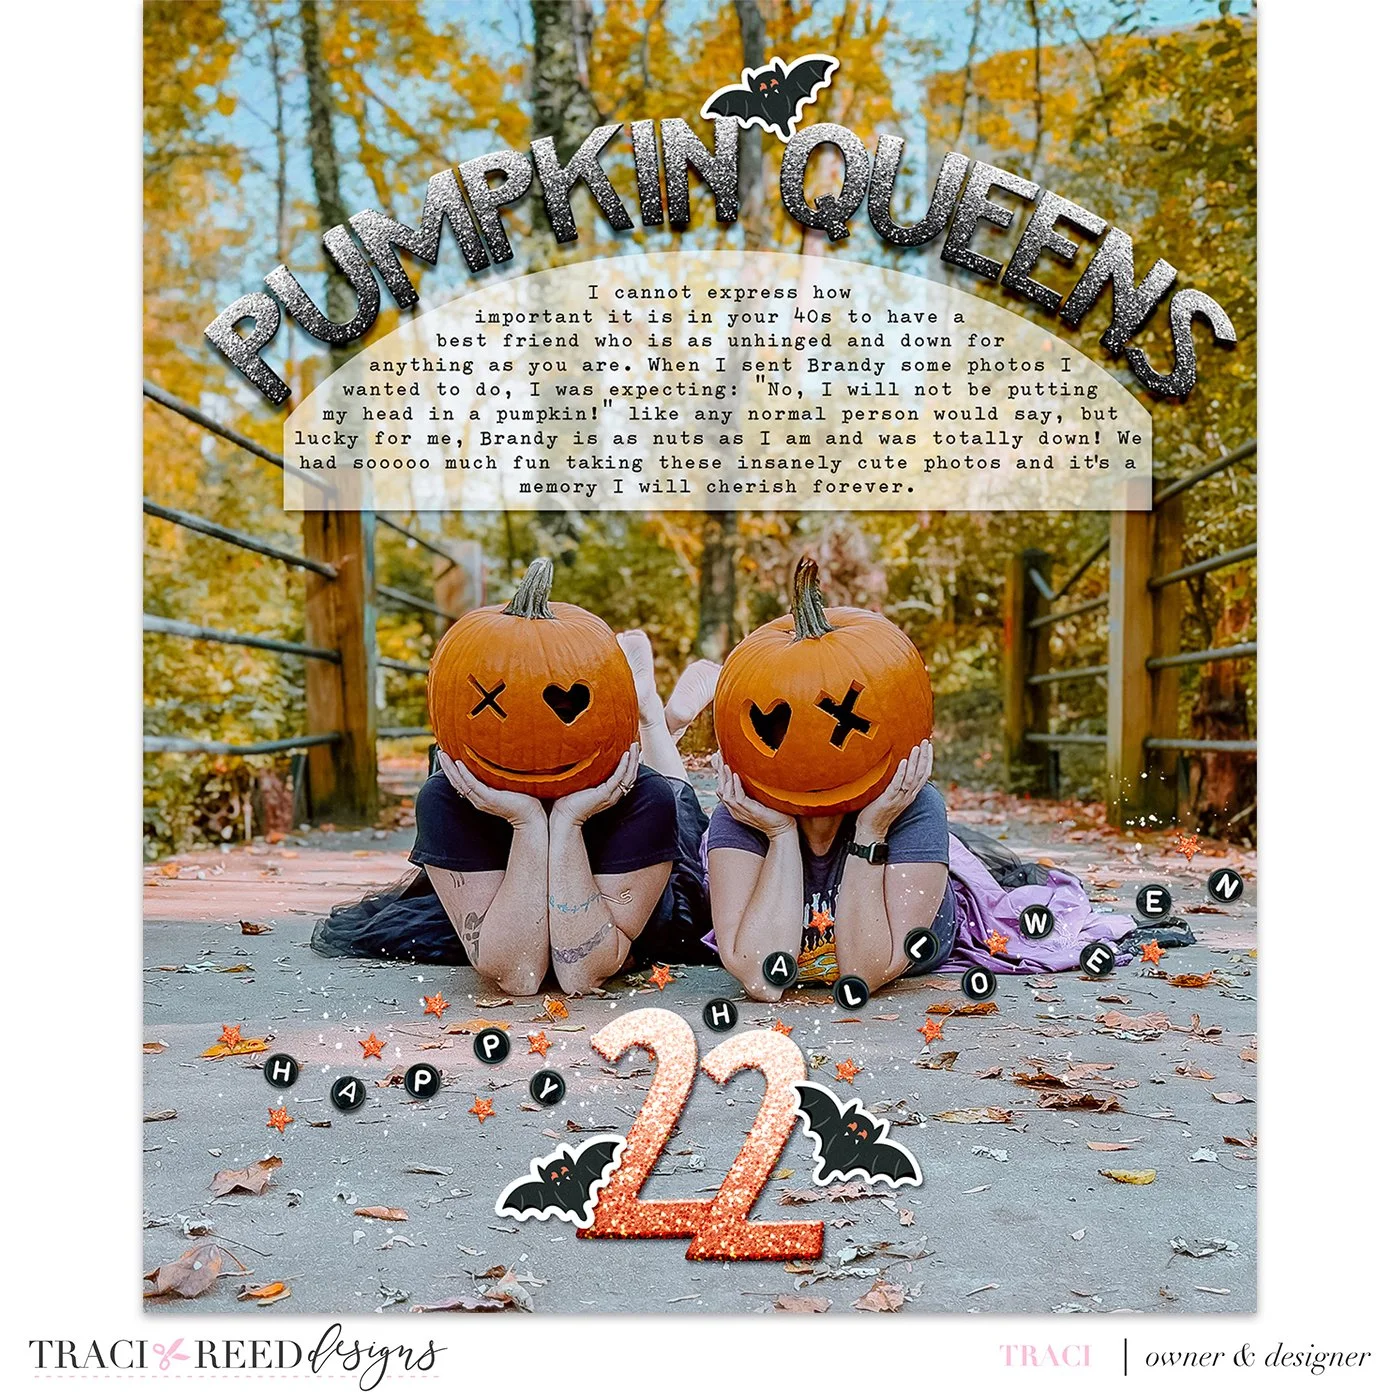
Digital Tutorial: Create an Arched Title and Custom Arched Text Box in Photoshop
Hey friends! Yes, it’s November and I’m still working on my October Daily! Today I’m bringing you a tutorial on how you can recreate that fun arched title and matching “vellum” journal mat in Photoshop with ease!
Tutorial
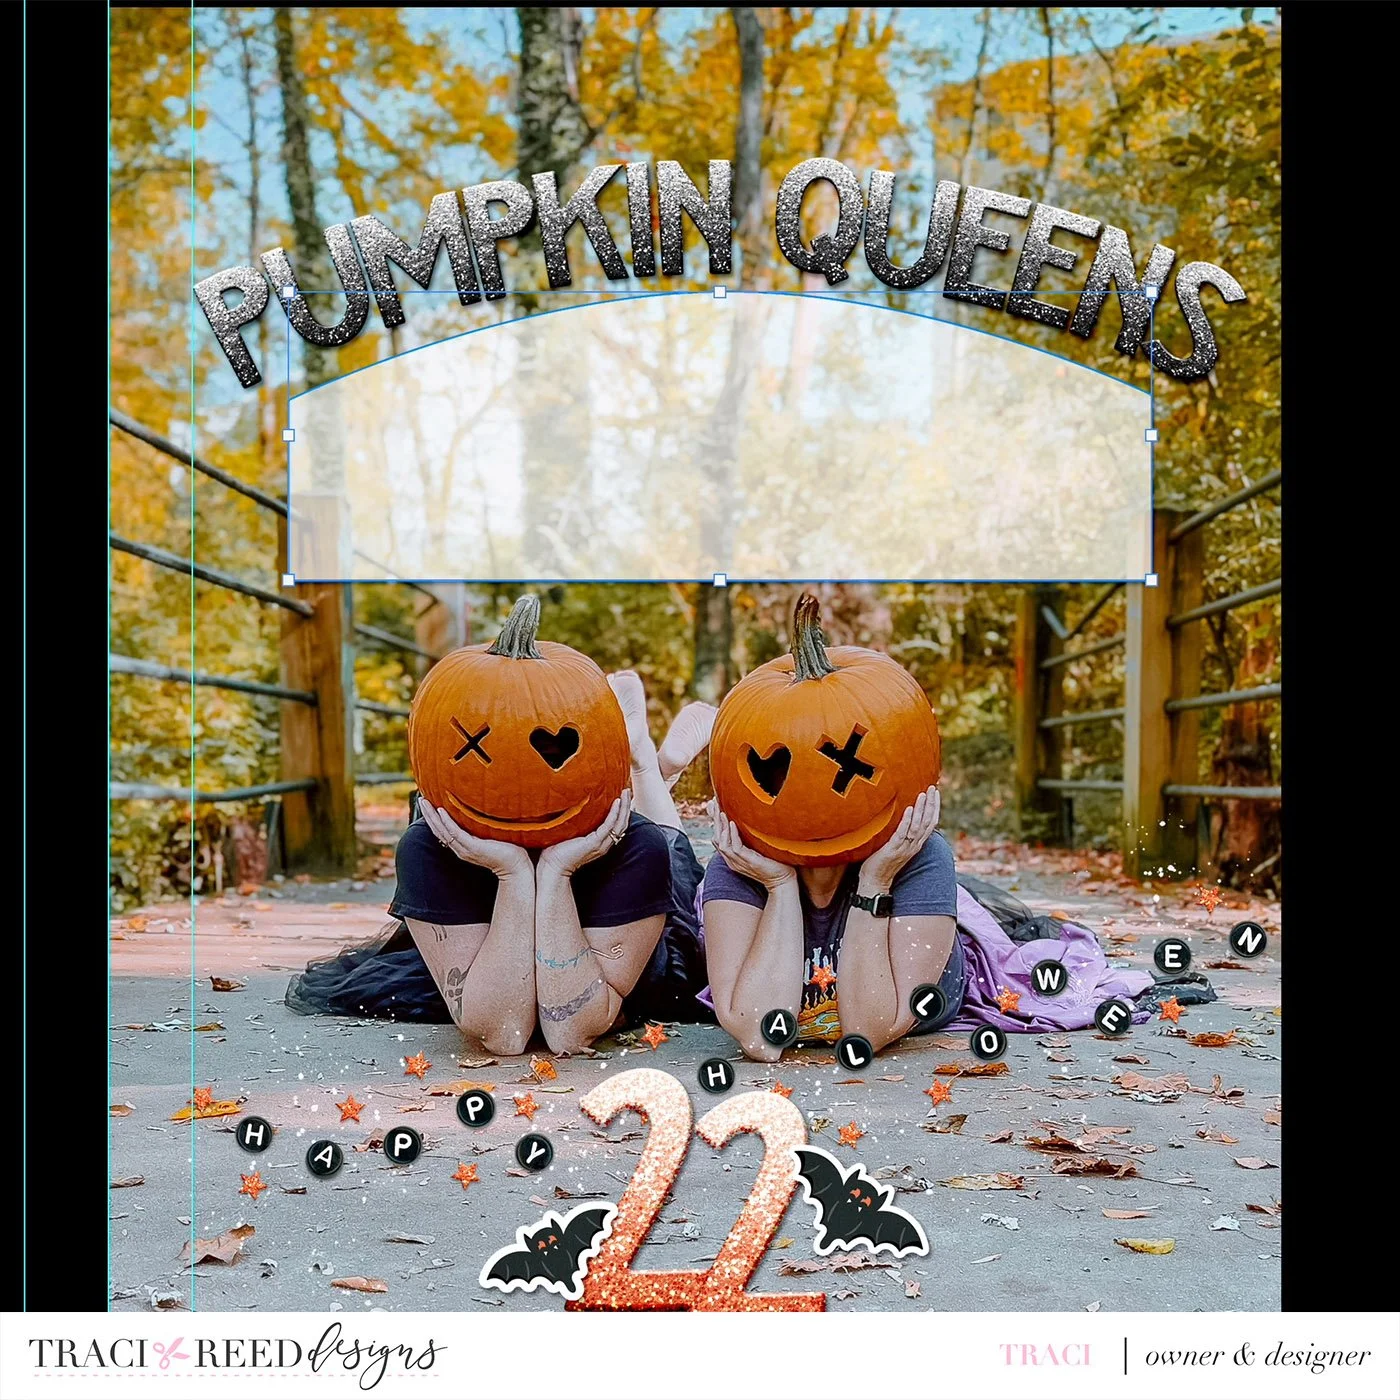
First, lay out your title in a straight line:
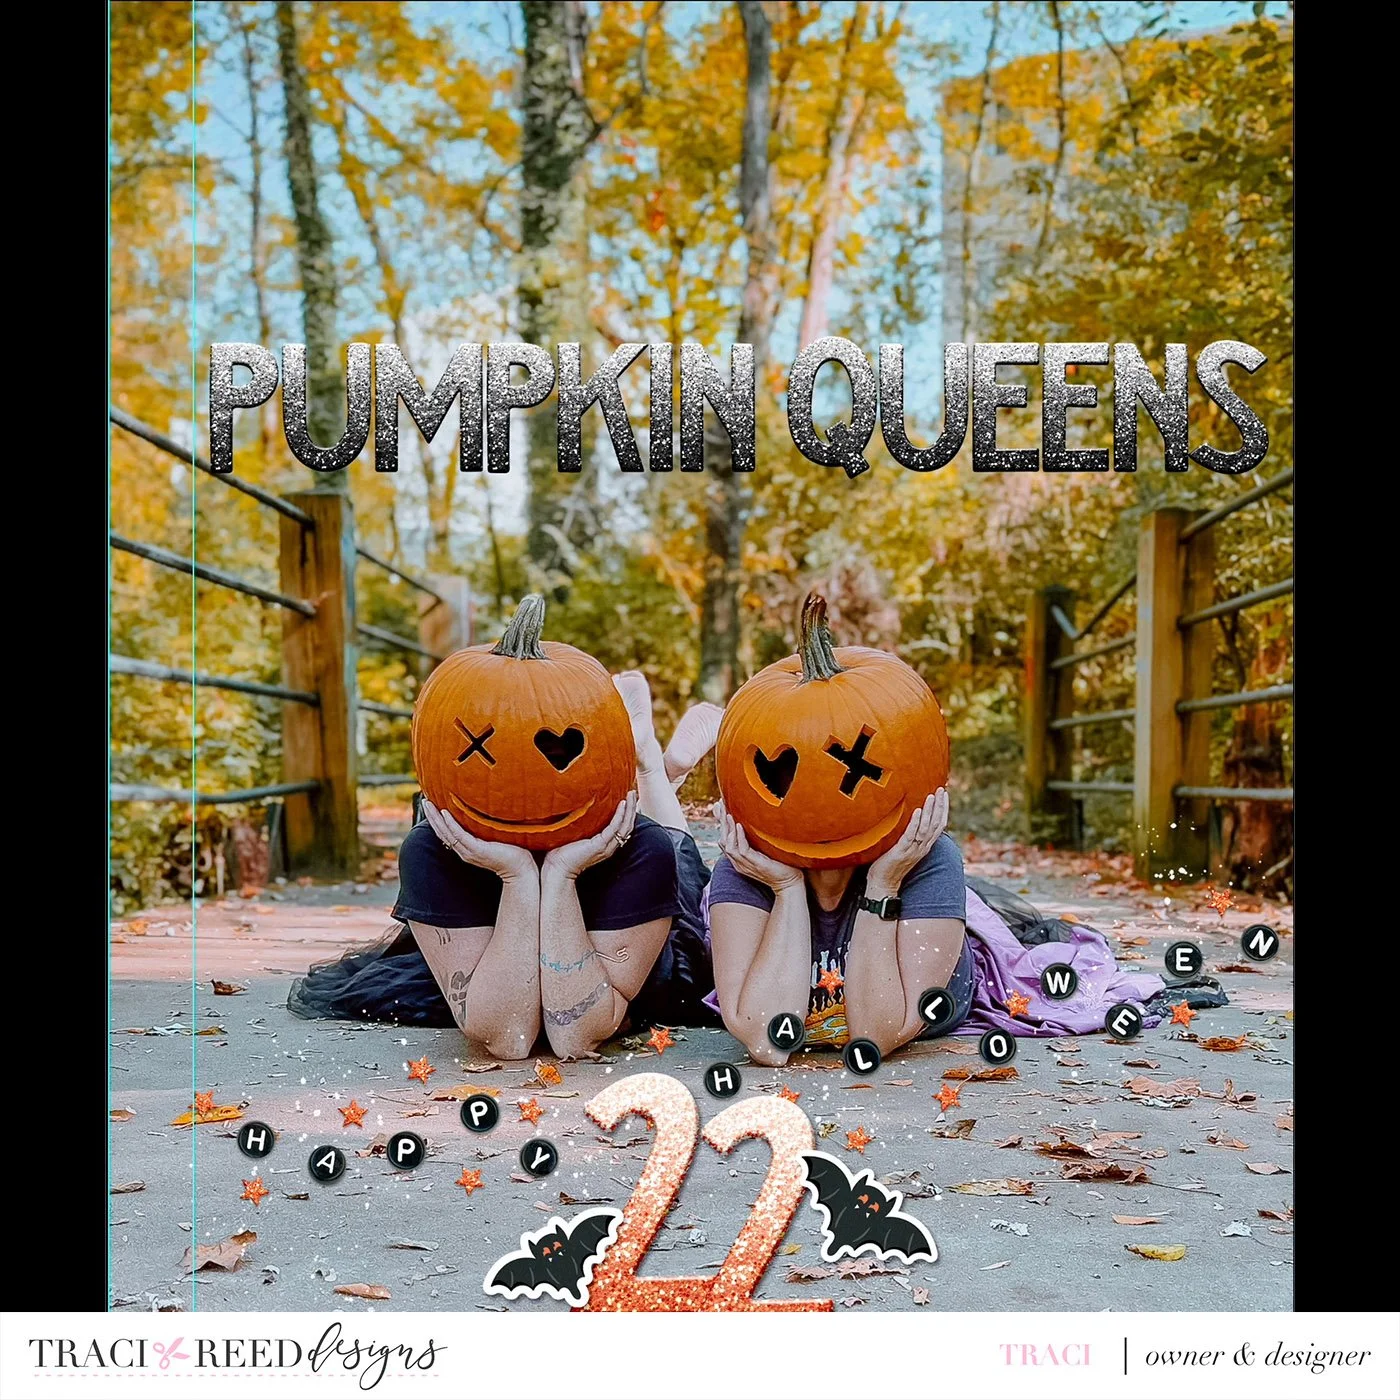
Resize and center as needed. Since I am leaving room on the left hand side of the photo to punch holes, I have a guideline set so that I don’t move my title past that point.

Select all your letters and merge them together into one long title.
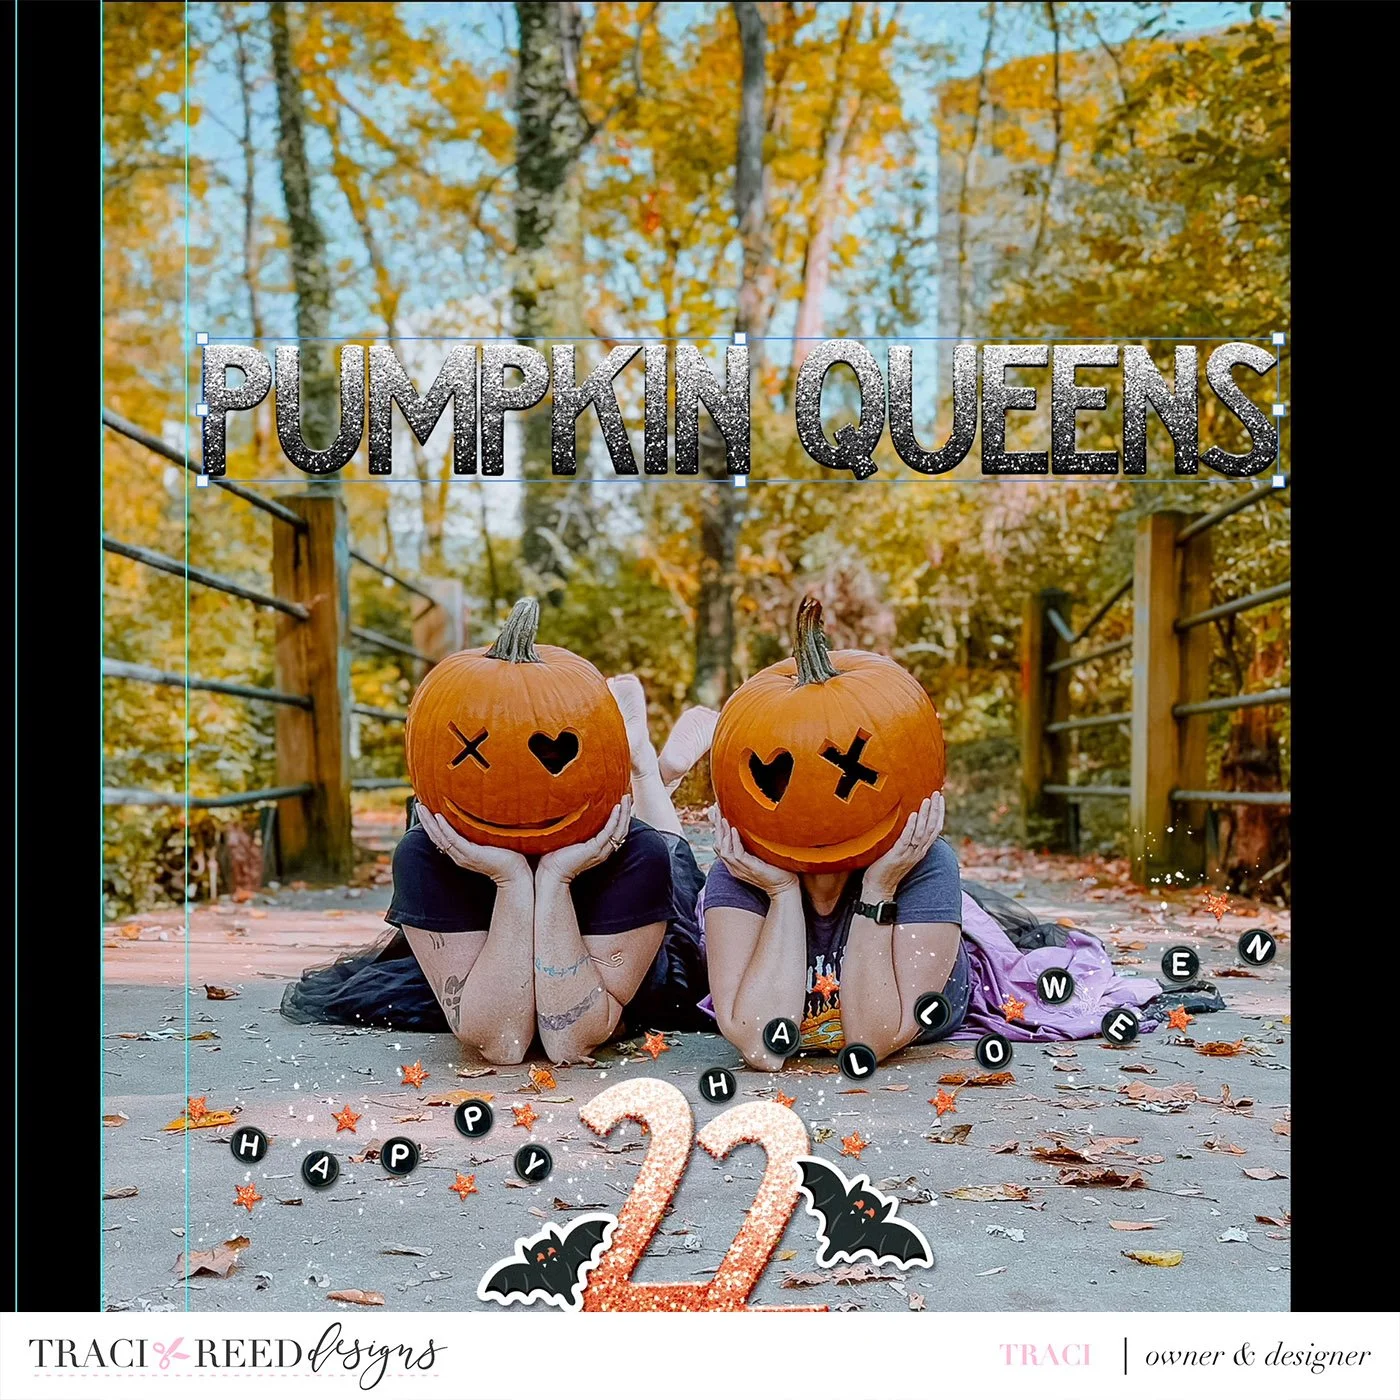
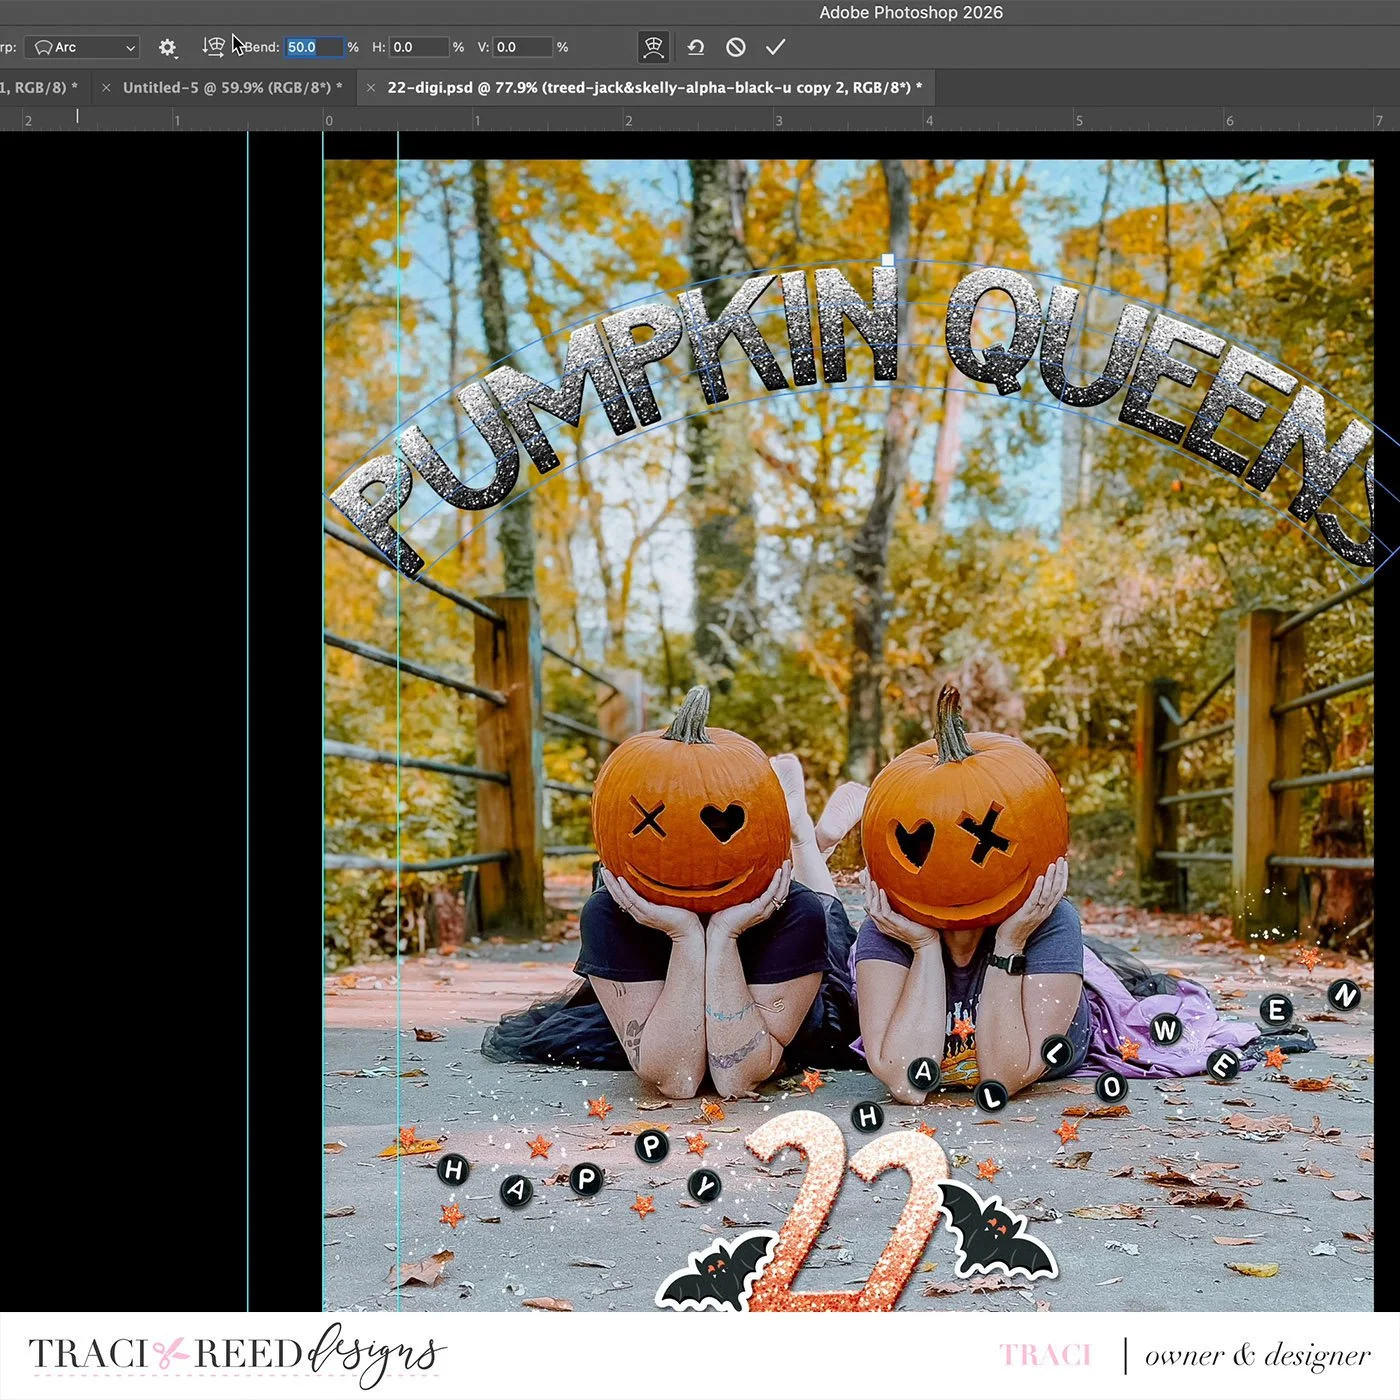
With your title selected, go to Edit>Transform>Warp

Set the warp to “Arc”

And the Bend to 30-50% depending on your page and the length of your title. I chose 30% for the tutorial but 50% for my final page so that you can see the difference in arc between the two.
Resize again as needed and center to your page/image

And there you have it, your arced title! Next, let’s add a matching custom photo mat!

With the rectangle tool or pen tool, draw a box below your title. I chose the pen tool because I like to do things the hard way, but drawing a rectangle will work too.

With the pen tool, add a point to the center-ish of the top of your rectangle

Drag that point up with your direct selection tool, and it will automatically arch, but you may need to adjust with the convert point tool.

Resize the box as needed. I moved my title up to accommodate a larger text box

To make it look like “vellum” I added a drop shadow and reduced the opacity to 70%
Now that my mat is done, I can add text by choosing my text tool and just clicking inside the mat while it’s selected. It will autofill with filler text that I can edit.
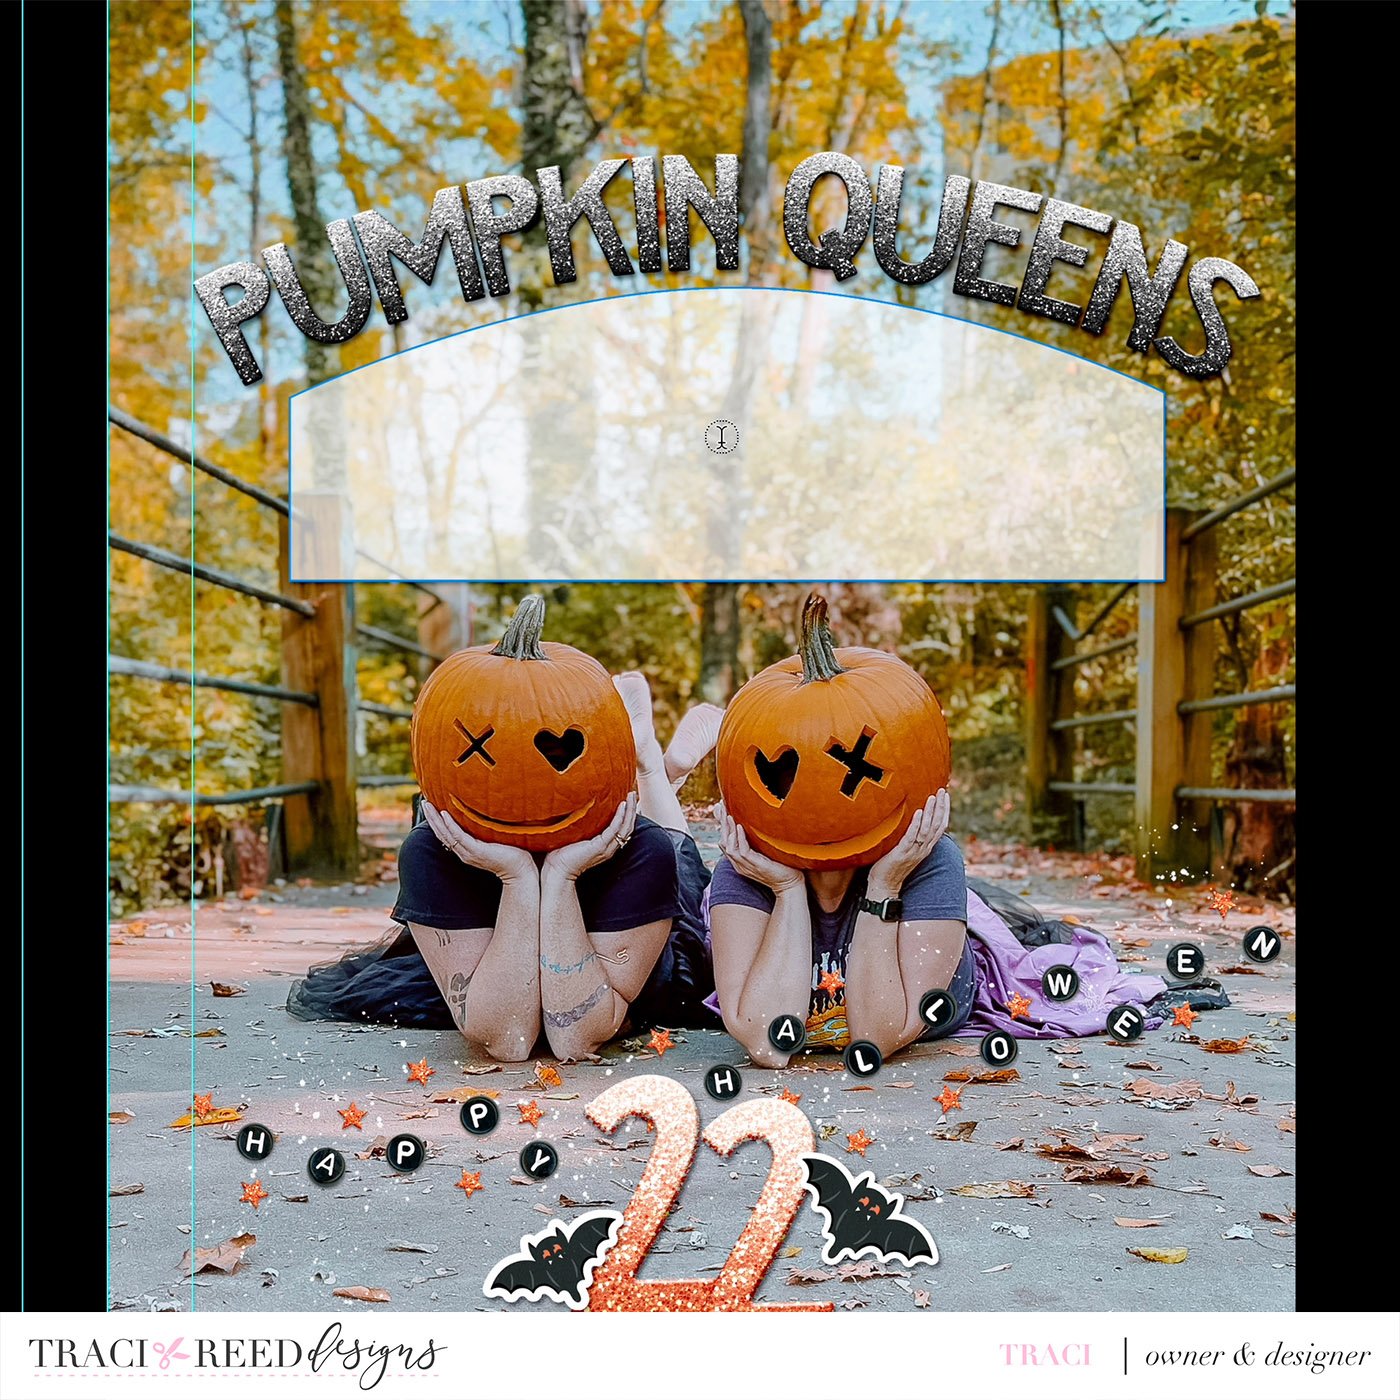
We’re almost done! Now we need to adjust the text box so that the text doesn’t go all the way to the edge of the mat like below:

With your text highlighted, hold down ALT or OPTION on a Mac and click and drag the text box sightly smaller from all sides. By doing it this way, it doesn’t change the size of the text and will re-adjust it to fit the new text box size instead.
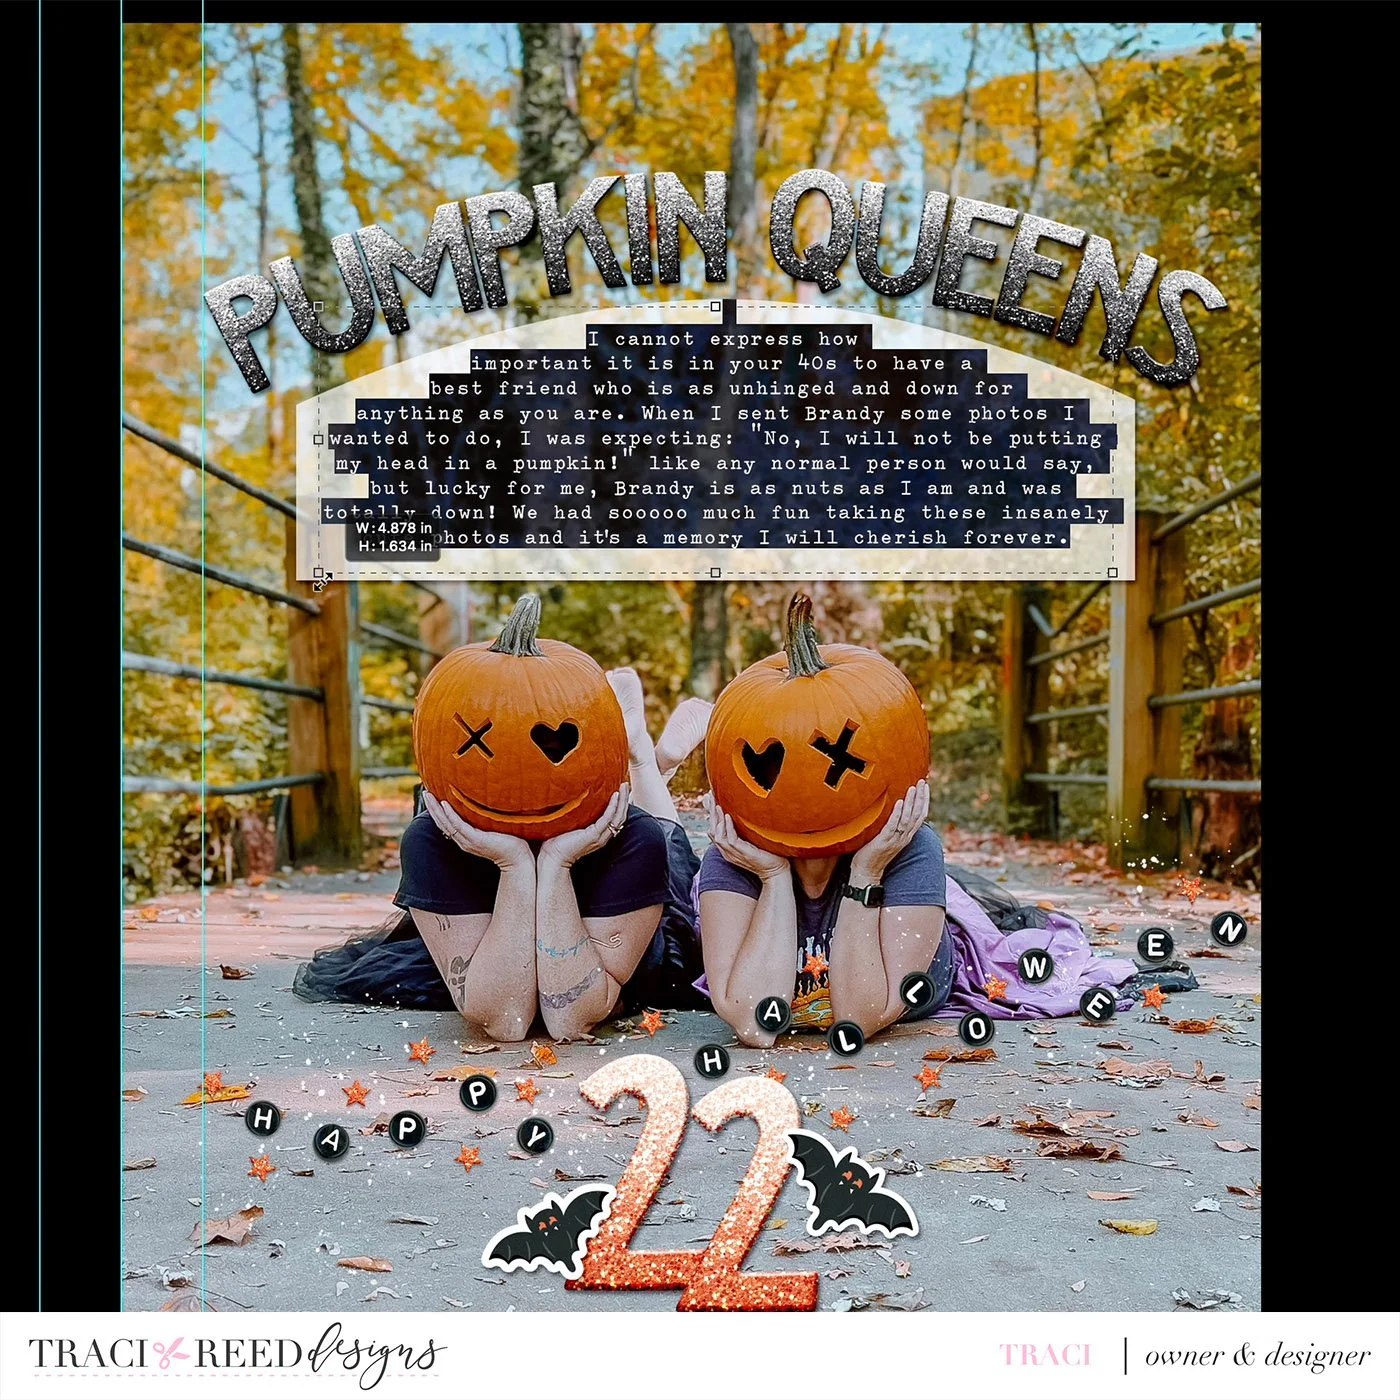
The last step is making the vellum mat a little smaller as needed, you can see that I have too much mat below my journaling now, so using the direct selection tool, I selected both bottom points of the mat

And then dragged them upward to make the mat smaller

And that’s it! You now have a gorgeous arched title with matching text box. Optionally, you can delete the vellum mat if your photo allows for text directly on the photo (mine needed a buffer.)